Showing posts with label Tips - Techniques. Show all posts

Monday, July 22, 2013

Selamat Berpuasa

In this month of Ramadan, we wish all our Muslim customers Selamat Berpuasa! 

This is also a good time to sit down and recollect all the precious happenings over the last year and take this opportunity to take out all (print out) all those beautiful photos taken over the last 12 months, and create something memorable to cherish as we look forward to celebrating the Hari Raya Aidilfitri with loved ones. 

Make this time an even greater inspiration to create for loved ones, be it a handmade Hari Raya greeting, or a signature brag book or even a scrapbook album for keeps.  I'm sure it will be one of the best Hari Raya gift anyone could receive.  And trust me, it will be cherished for a long time to come. 

Visit our blog and Facebook page often for updates, special deals & inspirations.

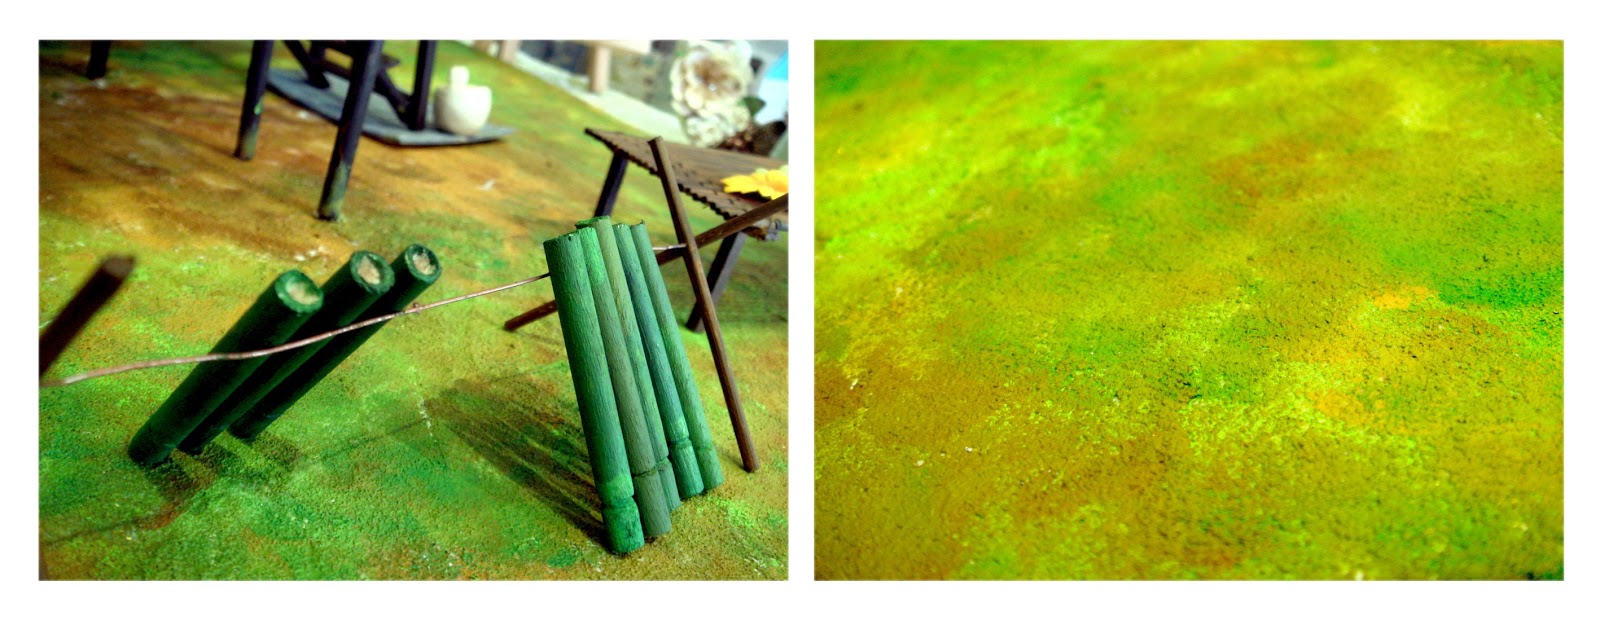
Oh!  Don't forget to visit our little Kampung House (in-store) created by our creative team just for this special occasion. 

Selamat Berpuasa!

Team at Papier

Raya Decoration from Papier Team
Raya Decoration

Materials used

      1) Martha Stewart                                         2) Tim Holtz Ranger
          - White Texture                                                - Alcohol Ink (copper)
          - Stucco Paint                                                  - Distress Embossing Powder
          - Pearl Paint
          - Sparkle Texture

      3) Prima Marketing                                      4) Echo Park
          - Wood Embellishment                                     - Paper (All About Boy Collections)
          - Paper (Fairy Rhymes Collections)

      5) SLICE Making Memories
          - Thin Metal Sheet


Check out our Facebook Fan Page 
for more images
OR
visit us at Papier, The Curve.
Salam Ramadhan from all of us at Papier.

Wednesday, July 3, 2013

Idea Gallery & Sharing the tips

Howdy and Happy Monday!

Ponder these questions:
What do I want the end result to be?
Why am I doing this? Who is this for?
What do I want to get out of it?

With this type of thought process, many of you will come to a place of
greater clarity about your scrapbook organization.
It might take a little time to realize whatever it is that you need to realize.
But many of you truly will have an a-ha moment. Super!

However …
Many of you will not necessarily have the light bulb moment,
but rather you will throw those questions and this blog post
to the wind and say Who cares about a system!? I just want to play!

And you know what? That’s okay too.

“Figuring out” a scrapbook system isn’t for everyone.
Sometimes it’s best to just do something. 
Start somewhere and have fun and that’s it!
But for many (myself included), there is great value in thinking
about the big picture … even if it evolves and changes a bit over time

(which is a thousand percent perfectly okay!).

So, let's check my layout...
I'm using Martha Stewart butterfly punch.

I like to print out my own wording.

Chipboard diecut & I powdered emboss on it.

Make use on the chipboard diecut, enhance with paint & glossy accent.
One big photo is more than enough


In addition to your own personal pondering,I’m sharing some additional thoughts on this topic – from me, and from our Creative Team.As with everything else in scrapbooking, there is no right or wrong, no best or worst.Do what feels right for your life, your situation, your family, your sanity.The purpose in sharing these ideas is the hope that something will stand out to youas something you want to consider for your own system …or perhaps a completely different idea not even mentioned here will pop into your mind. 

Final Layout
PRODUCTS USED :
1. Graphic 45 - Olde Curiosity Shoppe Collection -
Mercurial Masterpiece - 12 x 12 Double-sided Paper

2. Graphic 45 - Olde Curiosity Shoppe Collection -
Butterfly Specifics - 12 x 12 Double-sided Paper

3. Bo Bunny - Et Cetere Collection

4. Black Cardstock - Photo Matting & Film Strip

5. Plain 3mm chipboard - to cut the gear

6. Craft Cardstock - Wording

7. Old Books - Embellishment

8. Sizzix Bigz Die - Gadget Gears

9. American Crafts ZING! METALLIC Embossing Powder - COPPER

10. Tattered Angels Glimmer Mist - Gold Metallic

11. Dusty Attic's chipboard word diecut - together

12. Tim Holtz® Distress Ink Pads - Vintage Photo

13. Martha Stewart - Butterfly Punch


Cheers!!!


Friday, June 7, 2013


Father's Day is around the corner!

16th June 2013!

Dad loves you and guides you each and every day.
It's your turn to show how much you love him.
Express your love with a simple handmade card.
Join us for a FREE Punches DEMO
&
Father's Day Card 'Make-n'Take' session.

DATE:
Saturday (8th June 2013)
&
Sunday (9th June 2013)

TIME:
3pm - 5pm

First come first serve
*LIMITED QUANTITY*

AND

enjoy the 'Make-n-Take' promo


Friday, February 15, 2013

Happenings on 16th Feb 2013

Hello all, here's what's happening at the store tomorrow. Please feel free to drop by and enjoyed a Project Life Crop Session in the morning and Paint Demo in the afternoon. Details as follows:

Project Life Crop Session

Date : 16th Feb 2013
Time: 11.00 am-12.30 pm
Dt In Charge : Kak Aini
* Please bring along your own PL kit and embellishment

Paint Demo

Date : 16th Feb 2013
Time: 2.00 pm-4.00 pm
Dt In Charge : Aznida

I hope to see you at the store tomorrow. Have a good day. :)

Saturday, January 26, 2013

In Store Demo - Punchers

Head over to Papier store this weekend for a free demo from our design team. 

Details as follows:

Date:                 26th Jan 2013
Time:                2.00pm - 4.00pm
Venue:              Papier Scrapbook Store, The Curve.
Product Demo: Punchers
Dt in charge:    Sharmandeswari (Sharm)

Come and view samples and demo on how you can maximized the use of punchers.  While you're at the store do check out our stocks. See you soon!  :)


Monday, April 30, 2012

Stamping with Acrylic Paint - Tutorial


Hello everyone, i'm back to share a simple tutorial. This technique is nothing new to some scrappers in fact it's made famous by Tim Holtz himself. If you've missed his You Tube and blog tutorial then pls read this post for my version of image tutorial. :)


I've done it in a few simple steps and of course i add my own style to my tags. Hope you will find it easy to follow and have a good week. 


xoxo

Amelia

Monday, February 13, 2012

A Layout Tutorial


I have a simple layout tutorial to share today. In a few easy steps you'll be creating a page for yourself. First gather your supply. 


I'm using Kraft Cardstock as the base, Packaging from Prima and Tim Holtz to create layers, few strips of Pattern Papers, Doilies, Stamps from Hero Arts, Hero Hues, Stanz On Permanent Ink, 3 colors of mists, Buttons, Paper Clip, TH Tissue Tape, TH Metal Embellishment and MME Chipboard Stickers.  


I start with the bottom right of the Kraft Cardstock by layering 2 different Pattern Papers and Tissue tape. 


Next i misted the area lightly and stamp random image using Hero hues


For the top left corner of the cardstock, first layer is TH Packaging followed by Doilies, Pattern Papers, Prima Packaging and few more strips of Papers on the top. 


Randomly add Tissue Tape, mists and stamp image of gears and bubble stamp. 


Lastly adhere photo and embellishment as picture above. 

Have fun trying and enjoy your week everyone..:)

xoxo

Wednesday, August 10, 2011

Standing Mini Album

Here's a cute project to have on your desktop at your workplace or your craft table of what inspires you most.. In my case, it's always my lil gurl Missy A :) This album is assembled using only 4 pieces of chipboard. For a closer look at how it's put together, drop by the store to take a peek! ;)


Front cover of the album is embellished with die cut frame and die cut stickers


When the cover is opened, the album will stand


One of the corners of the album


Back page of the stand album


Materials Used : Chipboard, Basic Grey Patterned Papers - Olivia, Basic Grey Die Cut Stickers - Olivia, Tim Holtz Baroque Die, Martha Stewart Border Punch, Prima Flowers, Buttons

Wednesday, July 27, 2011

Accordion Mini Album

Hey there! How has your week been? mine was fantastic (though with a bit of glitches here and there....from internet problems to a host of other things) Well, today I've got a Accordion mini album to share.. :)

This album can be made using one piece of cardstock cut to the dimension of 3X12. After which you will need to score the cardstock to the measurement of 3X4 and fold up at the scored area.

I basically layered each page with 7gypies patterned paper (perfect for travelogues cause of its' numerical and time piece patterns) and some extra Basic Grey stickers that I had from my previous kit.

here's the mini,


Materials Used : Cardstock, 7Gypsies patterned paper, Basic Grey Sweet Threads Die Cut stickers, Martha Stewart Butterfly and Border Punches, Pearl Blings, Prima Flowers, October Afternoon wildcard.

Wednesday, July 20, 2011

Canvas Bookmark / Page Marker

hello! happy wednesday to you! :) guess who's back this wednesday to share a project with u lovely peeps? me of course! Lol!! and today I'd like to share a canvas page marker / bookmark with you!

Some easy steps to follow:
1)Slap some medium (you can also use mod podge. I've used Claudine Hellmuth for mine) onto the die cut canvas sheet and some onto the paper
2)Place the patterned paper atop the canvas sheet
3)Wait for it to dry
4)Using a spritzer, spray some water off the back of the patterned paper and rub off lightly
5) You will notice that the image from the patterned paper is transfered off onto the canvas sheet
6) Stamp random areas with script stamp
7) Embellish


Materials Used : Canvas, 7 Gypsies Patterned Paper, Claudine Hellmuth Multi Medium - Matte, Handmade flower embellie, Hero Arts Script Stamp, Hambly Screen Print, Martha Stewart Border Punch, MME Lush Patterned Paper, Ranger Distress Inks, Ribbon

Wednesday, July 13, 2011

4x6 Card cum Photo Holder

Hello there! can you believe it's mid week already (mid year too :P )? I'm sooo looking forward to this weekend where I'll be off to Singapore for a lil holiday with my sis & cousin! happy happy happy!~ lol! :)

Anyhoo..as with every Wednesday, it's my turn to share a lil project with you crafty ladies! and what have I got up my sleeves for ya ? a simple lil 4x6 card with a small slot inside for you to add in some photos...a fun idea for you to try I reckon? :)

My DT kit this month had yummo Glitz Design patterned paper and Tim Holtz Coredinations Cardstock..the cardstock was a joy to play with considering it came with embossed polka dots that I could sand and squash to get a two tone effect for my handmade flower embellie..I love making my own flowers and believe you me, the Coredinations cardstock is purrfect! :)


Cover of Card


Inside of Card - Slot for Photos (fits 3 sized photo perfectly ;))


Materials Used : Glitz Design Patterned Paper, Coredinations Cardstock, Ranger Distress Inks, Ivory Cardstock, Stamp, Lace, Tim Holtz Flower Die, Ek Success Border Punch

Wednesday, July 6, 2011

Altered Canvas

Good day ya'll! :) It's a beautiful Wednesday and with my turn at the Papier blog, I'd like to share with you an altered canvas! ;) It was made following these simple steps:


1) Stamp all round the canvas with a script stamp (or any other background one of your choice)
2) Create a background for photo using rub-ons (I've used the Glitz Design Love Nest rub-on)
3) Tie a bow around the Maya Road sheer tag
4) Adhere photo, tag and flowers

Easy peasy eh? Do try it some time! ;)


Materials Used : Canvas, Maya Road sheer tag, Grosgrain Ribbon, Glitz Design Rub On, Hero Arts Script Stamp, Prima Flowers, Sticker - Basic Grey, Handmade flowers, Ranger Distress Ink

Wednesday, June 29, 2011

Hey Buttercup!

Hey there!! It's Wednesday and that means a DT project by me to share with ya'll! and what have I got in store? a layout! :)

As shared with ya'll in my previous posts, my
Papier DT kit this month had Basic Grey papers. This range is rather on the colourful side, but beautiful nonetheless, and matching 'em together for layers was a tad bit tough..but here's what I came up with, hope it inspires you! ;) I hardly ever use patterned papers for my background, but I must say I do like how this turned out! :)

I also had some vintage lace which I quickly turned into a flower ;) It's nice for a change don't ya think? Something different from the usual of just adhering across the page. I also used vintage buttons for the centres..and then I further embellished with some die cut chipboard stickers of the same BG range..

Here's the layout ladies! :)


Materials Used : Basic Grey and Martha Stewart Patterned Papers, Martha Stewart Border Punch, Basic Grey Stickers, Vintage Lace & Buttons

Wednesday, June 22, 2011

More Basic Grey

Hey there! I'm back with another post today using Basic Grey's Sweet Threads line! My DT Kit this month came with alot of PPs from this fabbie line..and I wanted to try something other than cards/layouts and when right away to make this lil envelope..

All you need to do is, get an envelope and trace the shape out on to a patterned paper of your choice. After that, cut out the shape and using tape runner, tape up the sides. Once you've got your envelope up, embellish to your heart's content! ;)

Easy peasy huh! ;)

Anyhoo... here's the lil envelope...hope you have an inspiring day! :)


Materials Used : Basic Grey Sweet Threads & Lucious line, Hero Arts Script Stamp, Ranger Distress Inks, Envelope for template

Wednesday, June 8, 2011

You Brighten My Day!

If there's one thing I've learnt in card making, it's got to be that there can never be enough fussy cutting, distressing and..layering! yeap you read it right! Layering need not only be used for scrapbooking but it works great on cards too!

And when you have beautiful papers by Basic Grey, it definitely makes it all the more difficult to avoid fussy cutting..and layering! Here's the card I'd like to share with you'll..featuring just that..layers! :)

1) Cut out cardstock to 4x12
2) Cut out three strips of patterned paper
3) Place one strip down, punch the long length of the edges on either side for the other two strips and adhere on top
4) Tuck in some fussy cut patterned papers
5) Add on a chipboard sticker / any image
6) Sentiment of course! :)


Materials Used : American Crafts Cardstock, Basic Greay Sweet Threads Patterned Paper & Chipboard Stickers, Ranger Distress Inks, Ek Success Border Punch, October Afternoon Chipboard sticker

Wednesday, June 1, 2011

Altered Folder

It's the school holidays now and I bet you ladies are trying reeaaaalll hard to keep your gurls occupied *lol* Here's a lil project that'll keep those little hands busy...a lil altered folder that they can take back to school! How cool is that eh? ;)

You can get these folders at Daiso and I find that the Basic Grey Luscious collection are pretty to deco it up ;) Being one that loves fussy cutting, I couldn't resist doing just that! lol!! :) I've also used the Prima Flocked Rub-Ons which is such a cool product! your kids are gonna fun with this piece of craft supply! ;)

Without further ado, here's the project, simple enough for your dear one to execute without much supervision ;)


Materials Used : Basic Grey Patterned Paper, Prima Flocked Rub-Ons, Ribbons, Jenni Bowlin Button, BG Sweet Threads Sticker

Tips :
1)Try distressing the edges and fussy cut flowers
2)A bit of stamping will create a more defined look (Try a script stamp for the background)

Wednesday, May 25, 2011

Create Card

Hey there! Today's post by me is a card using the very pretty and glitterly My Mind's Eye Lost & Found Collection Patterned Paper..I had half the mind of not cutting them up, but..a gurl's gotta do what a gurl's gotta do isn't it? *Lol*

Anyhoo..here's the card I'd like to share with ya'll..my kit this time had lotsa vintage buttons and cards..and I used one of those vintage cards for this post today..I love that lil camera image! simply gorgeous don't ya think? ;)

Just to share a few tips with you crafty friends :
1) Gesso out words / phrases that you don't want...the Gesso effect will give a vintage feel
2) Don't be afraid to glam up a vintage card further. I stamped some text images around this piece
3) Leftovers / scraps left behind by punched out portions can be assembled to form pretty flowers (like what I have done for the flowers on this card ;))


Materials Used : Ivory Cardstock, My Mind's Eye PP, Ek Success Border Punch, Bling, Cosmo Cricket Tiny Type Sentiment

Tuesday, May 24, 2011

'Remember' Mini Album by Rosa

Hello happy crafters! Time flies when we're having fun. The month of May is coming to an end. This is my last entry for Papier. I'm taking a short break from my DT post for Papier, I will be back hopefully end of this year. I decided to take a break as I have many things to juggle in the next few months. I will still scrap, thats for sure. You can check out my blog HERE for updates and more projects / creations by me.

This month its all about stamping and this is my last posting for Papier as I'm taking a break. Presenting my mini album with lots and lots of stamping. Hope you are inspired to start stamping and create your own pattern paper and embellishements.


I was inspired by my butterflies stamp collection, so I decided to use it and create my background pp for the whole mini album. Butterflies everywhere. I also stamped the sentiments and the journaling tag.


Do you like my creation of pattern paper? Give it a try, take out your stamps, start stamping and create your own background. It's easy and fun. Till then, happy stamping!

Materials used: My Mind's Eye pp, Plain cs, Pink Paislee pp, Rubber stamps & Clear stamps, Distress Ink, Liquid Pearls, Stickles, Tim Holtz Tissue tape, Acrylic paint, Jenni Bowlin chipboard button, Lace, Sizzix Dies.