Tuesday, January 31, 2012

Layout - A Small Wonder

Hellooo scrappers, it's my turn today to share with you a piece of  LO that I whipped using the  last bits of  my January DT kit. Can't wait to share with you what I created with my February kit :0 


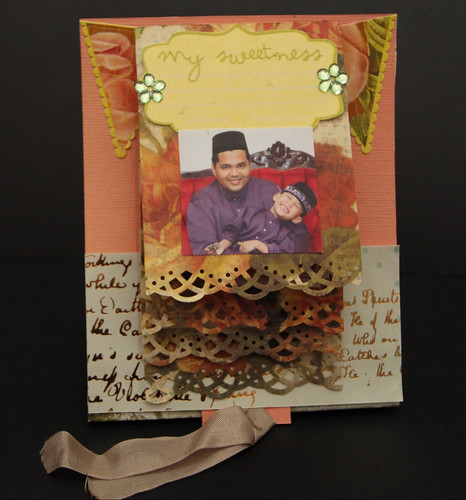
Notice the little fingers and the little chick? This cute photo was taken during our last holiday trip to Avillion. The resort comes complete with a petting zoo. How cool is that ! My kids went goo goo gaa gaa over it and they were just so funny! That's how city folks react to a whole lot of pets to cuddle and love at one time. LOL
OMG just realised ..the chick looks like its about to popped out from the LO..love that.
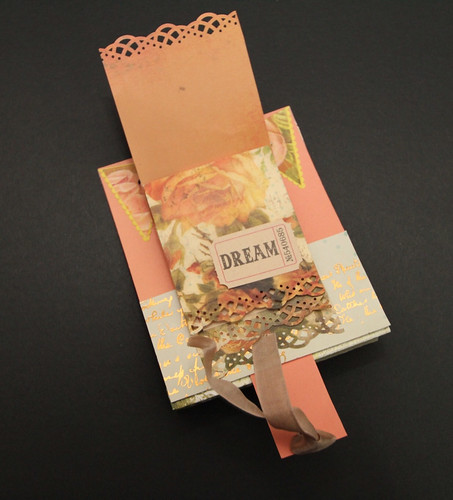
My first layer of the layout is my favourite pp by Webster's Pages that is the Yacht Club - Sandy Shore. Then the burlap and an envelope pocket by Amy Tangerine. Hues of earth tones are used to pickup the gorgeous colour of the chick. Not forgetting the peacock feather  ( I must clarify that I didn't pluck right  from the peacock at the petting zoo okay). I just found out that, like my 2 year old niece..I'm scared of peacocks! They were just always snobbish and angry all the time :(  Whylah??


Till next week peeps..Have a blessed week ahead..owh don't forget to pop by my Memory Vintage Workshop this Saturday at 10:30. Let's have fun and learn how to make a "book box". For those who wish to swap ATCs , please..bring them ..lotsa !! Just contact Papier to enroll okay , see ya  :)  XOX

Materials List
Craft Paper
Papers by Webster's Pages - Sandy Shore
Envelopes by Amy Tangerine
Prima Flowers
Pebbles and caboochons from my stash

Monday, January 30, 2012

Altered Canvas Back


Happy Monday scrappers! I'm sure everyone had a great holiday celebrating Chinese New Year and visiting love ones. I had a good one myself except that i came home not feeling well. Must be too much sun & sea. I'm glad however that I've managed to get few projects done for Papier and today sharing with you my Altered Canvas Back.


The Canvas size is the same as A4 paper and the backing is a deep hollow almost like a shadow box, it was a trend back in 2011 to altered the back of a canvas and shy to say i was a very late follower! lol. So anyway i got a courage to do one recently. The frame was first painted with gesso and while wet i sprinkle some distress embossing powder from Tim Holtz. Dry with heat gun and later i add some glimmer glam paint and spray mists from tattered angel's. The final treatment is to add Mod Podge to seal the colors and medium. 


Embellishment include die cuts from Tim Holtz, Stainless steel Pie Mold, Prima Flowers, Buttons, Blings, Lace, Seam Ribbon, Pearls, Twine, Ribbons, Cotton Gauze, TH Tissue Tape and Pattern Papers. 


Check back for more inspirations from the Dt's and do let us know if you want to see any type of projects or inspirations. We'd love to hear from you. Take care..:)


xoxo

Amelia

Thursday, January 26, 2012

Slider Card - 8 Easy Steps


Slider Card

This week I will be sharing with you on how to make a Slider Card.Its simple, fun and it takes only eight  (8) easy steps to complete a slider card.  


Step 1: Using the Spellbinders Nestabilities dies, cut three (3) identical label shapes. Next cut one (1) more label shape using the next smallest die with the paper that you’d like to decorate your front card.
Note: For this project I used the Spellbinders Nestabilities – Lacey Circles.  


Step 2: Stick the next smallest label to one (1) of the larger label. 


Step 3: Take one (1) label shape and cut off (approximately 6mm) from the top and bottom (or enough to square off the edge).


Step 4: Mark four (4) brad holes. Stack all three large labels together and poke neat holes through all three (3) labels.


Step 5: Cut two (2) identical card pieces for the “pulls” to an appropriate size (you can measure the distance between the centre brad holes for the size).


Step 6: Cut a strip of transparent plastic bag, slightly longer than the “pulls”. Wrap loosely around a trimmed label (the one in Step 3). Use a double sided tape to close the plastic around the label.


Step 7: Stick the “pull” pieces to the plastic with decorated sides facing up (Important: Make sure the “pull” pieces stick to the plastic not the card).


Step 8: With some brads put all three (3) pieces of large labels together. Your SLIDER CARD is now ready to be decorated. 


Here you are...simple guides to make your slider card. Enjoy!

- Inaz -

Materials List
Pink Paislee Sweetness Pretty Lace (Paper)
Pink Paislee Picture Perfect (Paper)
Kaiser Craft Madame Boutique Collection (Paper)
Lost & Found Blush "Favorite" Dance Paper
Prima Flowers
Ranger Ice Stickles - Crystal Ice
Making Memories Primary Mini Circle Brads
Daiso - Polka Dot Brad
Webster's Pages Designer Trim Country Estate
Plastic
Spellbinders Nestabilities -Lacey Circles
Martha Stewart Puncher


Wednesday, January 25, 2012

Promotions

We are currently running a promotion for the items below.

Selected Papers at 30% discount

Punchers at 20% + 10% for PCM & PECM.

Term & Condition applies and hurry while stock last!!!

Cards and a Tag

Happy Wednesday everyone! Hope you had a good rest over the long extended weekend. Me? Well, I tried a new recipe and it turned out ok. Did a few craft works, reading, etc and before you know it, gosh! it's already Wednesday!! Time flies ...
Anyway, here are my simple cards and a tag for the last week of January (for me). A bit on the creations below.


Tag: Make Every Moment Count.
I love working with Ranger alcohol inks. So here, I have incorporated a stamped sentiment on the pp and work on the alcohol inks onto the frosted glass. You can't see much of the ink details here, though. The pp, lace, stickers, ribbon 'buckle', frame chippie are all from my DT kit for this month. 


And finally, two simple cards from me using pp ( Glitz & Basic Grey), lace, chipboard sticker and brad from my DT kit. I've never used a tulle before on my cards, but it certainly is an interesting element to work with.

The clock and sentiment stamp on the card below are from Hero Arts, which is sold at Papier. And that!, happens to be the last piece of lace from my DT kit. Lol! 
Come and get your supplies now! 
And remember, just let your imaginations run wild! 

Happy Crafting!


-Nida-

Tuesday, January 24, 2012

Tags for Bags

Hey ! I would like to wish all  my Chinese friends Gong Xi Fa Chai. I'm sure everyone is enjoying every seconds of the long holiday. As for me..school holidays mean a lot of sleep-ins, less cooking and more crafting yay!! This week , I decided to make a bunch of tags that can upstyle practically any bag, tote or jounal.

This tag is embellished with some doilies and fabric petals. I planned to do a tutorial on how to make  these fabric flowers. However I need to get a tripod 1st.. I think. So stay tuned okay.

Hey try inserting them in a key chain and attach to your handbag. Not bad eh..


Materials list

Papers by My Mind's Eye and Basic Grey
Fabrics - "Tailor Made" by Cosmo cricket
Buttons and trims from my stash

That's all for now. Enjoy your holidays, dont forget to keep calm and craft on :))

Monday, January 23, 2012

CNY Business Hour

Dear All, kindly note business hour for Chinese New Year is as follows

Monday 23rd Jan 2012 - Closed
Tuesday 24th Jan 2012 - Resume at 1 pm

Business as usual 25th onwards. Have a good CNY and Happy Holidays! :)

i City Layout


Gong Xi Fa Cai to all!!!! May u prosper in the dragon year. I hope wherever you are be safe and enjoy your holiday with love one's. 


I'd like to share a layout using white cardstock, Graphic45 pattern paper, Handmade flower, Brads, Prima flower, Die cut doilies and leaf. The background is misted using tattered angel mists and stamp with Bubble wrap and Distress Ink. Prima packaging was used behind the photo to add layers.


Thanks for dropping by today and take care everyone..:)


Sunday, January 22, 2012

Happy Chinese New Year

We at Papier would like to wish all our Chinese friend's

GONG XI FA CAI

May the year of dragon brings happiness, joy and prosperity to all. Have a good week, be safe and enjoy your holidays.

xoxo

Amelia

Thursday, January 19, 2012

Flower Story - Framed Box


Happy Thursday everyone...I bet everyone can't wait for the long weekend. Don't worry, we have 1 more day to go...Yeehaa!!! :) and for those who are celebrating Chinese New Year...I wish you happiness, good fortune and prosperity in the New Year. Gong Xi Fa Cai.

For this week's project, I have worked on a framed box project using Tim Holtz Ideology Configurations 6.75" x 8.75". I removed the internal boxes and only took the cover and the removeable clear window for this project.


My favourite part for this project when I was wrapping the frame using Tim Holtz Ideology Tape Tissue. It was so much fun and easy to use - its now available at the store..


Three pieces of paper used for this projects. I have selected a papper from Lost and Found Collection - Favorite Dance for the background of the frame (luv the polka dot)..and for the yellow flowers: I used Pink Paislee Collection - Picture Perfect (from my DT kit this month) and at the corner I layered a paper from Webster's Pages Collection - Winter Fairy Tales (die cut).

For embellishment, I used some flowers from Prima Flowers, ribbons, lace, knob, etc. Something special for this project is you notice, I have added a small car from Hot Wheels.

That's all for this week... see you next week!

- Inaz -

Materials List
Lost & Found Paper Collection - Favorite Dance
Webster's Pages Paper Collection - Winter Fairy Tales (Diecut)
Tim Holtz Ideology Configurations 6.75" x 8.75"
Tim Holtz Ideology Tissue Tape Nostalgic
Tim Holtz Ideology Knobs
Webster's Pages Designer Trim -  Country Estate
Martha Stewart Puncher - Monarch Butterfly
Prima Flowers
Hot Wheels Car
Pearl 
Daiso - Fancy Brads

Wednesday, January 18, 2012

Waterfall card - with simple step by step tutorial

My Waterfall Card for Papier
Materials used for this waterfall card:
Base card: Bazzil Basics
Pp for waterfall card: Glitz Design (DT kit), DCWV and Pink Paislee
Adage tickets: Tim Holtz Ideology
Punch: Martha Stewart
Stickers: from my DT kit - last pieces of it
Rhinestones: Hero Arts
(maybe I'll work on more embellies...ha ha)
Most of the items above are available at Papier. Come to the shop today and include some of our craft items as part of your Chinese New Year shopping spree! 

-above shows the 2nd page of my waterfall card. Later to add more photos or light embellies-
Hola! Happy Wednesday everyone! This time I'm going to give a simple tutorial on how-to make a waterfall card. It's really not that difficult to make and the best thing is you can always alter it the way you like in the process of making it. It all depends on how you imagine the final result would be. I'm going to explain the process in the simplest way I can. I'm going to use unit in inches here.


 1. First thing, you will need a sturdy card as the base for the waterfall card. Here, I have used Bazzil Basics, of which I have cut about 4.5 x 6" in size. 
 2. Now we need to prepare the 'flip-strip'. I called this the flip-strip because this is the mechanism to flip the waterfall card later. The size of the flip strip I have used here is about 10x1" (length x width). 
 On the flip strip, we need to do some scoring on equally interval places on it to create as placement for the waterfall card later. Firstly, fold the flip strip in two so that you will have a 6" length on one side and a 4" length on another.On the shorter side of the flip-strip, we will work on the scoring now.

We need to score on 4 places on the shorter strip with each being 1" from one another. The topmost (scored line 1) of the score will be the one that you have scored earlier to create the 6" and 4" length on the strip. Now, just add three more downwards at 1" interval as explained before.
Now that you worked on mostly what is required for the flip-strip, let's put it aside for a while.
3. Now, we want to work on what I called the 'strip-base'. Basically, it is just a strip of paper (preferably as sturdy as the base card), which you need to paste lower mid-length of the base card that we worked on earlier to create a foundation for the flip-strip to work. 
Get anything from your scrap and cut out about 1x4.5". Just glue on the ends of this strip-base to your base card. Just on both of the ends and not the whole thing. The middle portion of it has to be free since this will create a path for the flip-strip to slide in and out. 
4. Now take your flip-strip and lay it on the base card with the shorter one facing up. You will need now to secure the end of the shorter length to the strip-base. Secure it with glue or just a scotch tape. It should not move when you are pulling the flip-strip in and out later. 
Now, you can put on a nice cover for the base card to hide the strip-base and all the Scotch tape. You can use similar paper like the one for the card base or choose another to your liking. Cut out about 2.5x4.5" out of the paper. The width of this cover should be the same as the card base and the height should be reasonably good in order for the waterfall card to be pulled inwards later. I have use height of about 2.5" in this example. Again, just secure it on the ends only, to the base card. 
5. Now, test your flip-strip. If its OK, let's try now placing the waterfall cards. We need to create 4 waterfall cards of about these sizes:
  1. 1st page: 3x4"
  2. 2nd page: 3x4.5"
  3. 3rd page: 3x5"
  4. 4th page: 3x5.5"
Once you have prepared the waterfall cards, start fixing it on the flip-strip. Start with the smallest one first and fix it to the lowest scored end of the flip-strip. Work your way up to the biggest card being on top. Now, you can already see the waterfall-like pattern on the card. Try pulling the flip-strip i.e. the longest end down. See how the cards start to flip outwards when you pull and flip inwards when you push in the flip-strip. You're almost done. What left to do now, is the card stand; as per my example as shown.
(p/s: please excuse the clutter on my working desk hehe. The more I try to keep it clean, the messier it becomes. Funny, eh? Can anybody testify to this? Lol! )
6. For the card stand, all you need is something from your scraps or  choose any coordinating colours of pp to your liking. In my example here, I have used a piece of paper from my scrap of about 8x4.5". The width shall correspond with that of the base card's. Score at 0.5" and 1.5" on one end only. Fix the first scored line to the bottom of card base and the other it's top. It creates a stand for your waterfall card. Of course, it's up to you to use your imagination to create this. (somehow, writing on card stand is the hardest part for me to do. Lol! But I guess you'd probably know what I'm trying to say anyway, yes?)
So, there you go folks! I do hope this tutorial is easy enough for you to create one on your own. 
If you happen to visit my blog, you can also see another waterfall 'mini album' that I did previously. It was total fun to create this one! and very challenging too! Most important thing is; is to have fun when you're creating. Just let your imaginations running wild! 
Until then! See ya next week and to all celebrating the Chinese New Year; Gong Xi Fa Cai. 
Welcome the dragon! ( can't help recalling one of my fav cartoons, Dungeons and Dragons!).
-Nida-

Tuesday, January 17, 2012

Layout - Happy Together

Twiddly..twiddly..twiddly..dee.. I miss whipping up a layout lol . True enough,, I guess I was in a
 " making boxes " phase that  lasted many weeks somehow . Really enjoyed making and exploring what if... Here's a simple layout that I made last weekend.

Simple but my colour..I'm back! I added sewing machine stitching along the borders using  calico fabric. A fabric patch was also sewn on the top left corner of my LO. I even stich the trim.. was lazy to glue it! Can you imagine the mess trying to glue the fibre. So next time when you're dealing with strips of fibre..try stiching :0


A close-up..I purposely sew in a crooked path ( tried very hard ). This is where I can let loose my sewing :)) It becomes art..the more crooked..the more artsy! Lol


Enjoy !

So friends...start cranking up your momma's sewing machine. Be brave, keep calm..and sew on :))
Materials List

Papers by Melissa Frances
Card stock
Buttons by Crate Paper
Flowers by Prima Flowers
Chip board flowers -  Sizzix die cut
Fabrics and fibres - my stash