Tuesday, February 28, 2012

ATCs anyone?

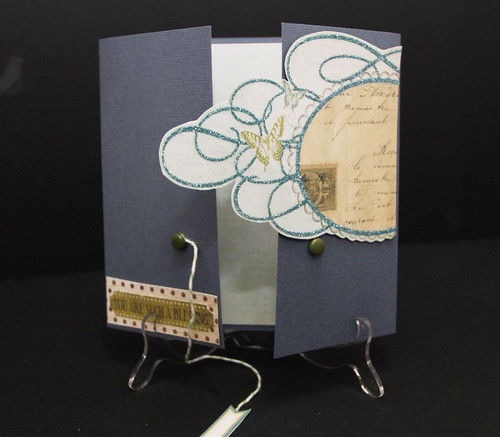
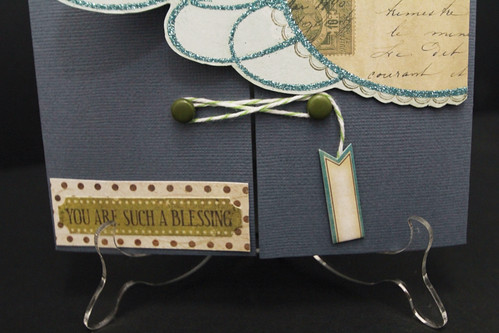
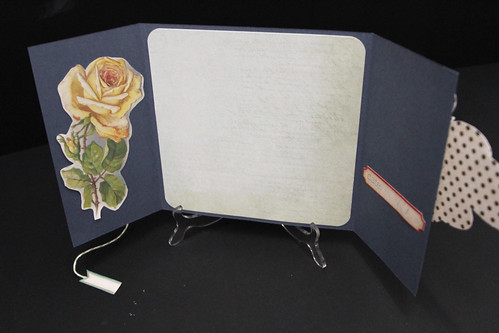
Happy Tuesday...hope all of you are in the best health and best mojo. Here's my latest batch of ATC that I'm happy to exchange with you. They are happily waiting for new owners at Papier. Do ask our friendly staff for my box okay.


Basically some of the techniques used will be taught in our soon to be announced (BIG TIME!) ATC/CROP MARKET on 25th March..so, please save the date and be prepared for some explosion of laughter and fun..always.


Notice the cute metal sentiment? I run my sandwich of embossing mould and metal sheet through my Big Shot-Pro and loveeee the effect. Decided to put all the metal sentiments on my ATCs to inspire you :))


Have a blessed week ahead..and hope to see you soon!

Monday, February 27, 2012

Chubby Alif Layout By AK


I love Monday just because i get to do my studio work at Papier! Have to admit i love my job so much! lol. Today i'm sharing another layout with you. I found an old picture of my son when he was about 1 1/2 yrs old. He was a chubby baby and lost weight at 2 till 7. Now that he's 9 he seriously have an appetite for food! lol. It's interesting to see changes in your child development and the most important is he stays healthy. 


For this page i used white cardstock, Kaisercraft and Prima Pattern Paper, MME Chipboard Stickers, Cotton Gauze, TH Tissue Tape, MM Glitter Alpha, Buttons, Mists, Stamps and a lot of fussy cut and layering. If you notice lately i like to tear out my papers, well there's a reason behind that. My paper trimmer needs a new blade and guess what? I can't find time to change it! Hah..that's how busy or lazy i am these days. Again if my trimmer was okay i wouldn't have created this interesting piece would i? lol. Enough excuses on my part.


For you crafters out there, don't let anything dampen your spirit to scrap. No trimmer, no precision scissors? It's okay just let your imagination run free and yes i am sure you'll find your magic touch somewhere. Till next time. Take care! :)


xoxo

Amelia 

Thursday, February 23, 2012

Stepper Card


Hi Everyone and Happy Thursday!

This week has been a super busy week for me...with work, deadlines,etc.I miss the long weekend and cant wait for the next public holiday..but somehow I'm glad that I managed to squeeze some time out of my busy schedule to complete my weekly project.   


So this week I will be sharing a card - Stepper Card (3 dimensional card). It is easy, fast and fun to work on this stepper card. Once you have a side stepper base you can decorate it however you like.


For this card I have decorate it with some butterflies and balloons using Martha Stewart puncher, pearls and buttons from Momoyo.

Small glass message bottle - highlight for my stepper card.

I have also attached a template of the stepper card for you to make your own. Have fun & enjoy...

Till we meet again next week...Happy Crafting!

-Inaz-

Materials List

Pink Paislee Oyster Bar (Paper)
Kaisercraft Miss Nelly Collection - Her Habits
Webster's Pages Designer Trim - Country Estate
Martha Stewart Puncher - Monarch Butterfly
Martha Stewart Puncher - Balloon
Momoyo Embellishments Buttons
Pearls
Distress Ink

Wednesday, February 22, 2012

Card Ideas - and a very simple one! ;)))

 Hi there and Happy Wednesday everyone! This week I'm doing a simple card with some of the materials from my DT kit. This card comes with a 'latching mechanism' (Lol!), well basically I've used 2 eyelets and brads and a lime twist to secure the card openings together. That's all! Hope you like it! 

And don't forget on our newly established ATCs group here at Papier. We will be leaving our ATCs at Papier and you are most welcome to swap with us! Just remember to leave your particulars behind your ATCs so that we know who you are! ;)))


 Materials used:

Base card: American Crafts

Pp: My Mind's Eye

Brads: Momoyo

Diecut flower: Glitz Design / Kaisercraft

That's all from me this week folks! Till we meet again, same time and same place! Ciao! 

Tuesday, February 21, 2012

Tutorial - Fab Fabric Flower

Howdy folks...ready for a tutorial ? Lets see if I can pull through alright..lol. This flower that I'm showing you how to make is my favourite. Simply because of the endless possibilities of how to use it. It can be a corsage, a sweet flower on your layout or card, a tag, a hairclip and so on..

These are the things / materials you need


Step 1
Draw 7 petals of a size you like, on an interface ( you can buy this at a tailor shop - its for thickening and strenghtening your fabric )

Step 2 
Cut out the petals and place the sticky side on the wrong side of the fabric. Iron on using a mini iron or your normal iron. Caution not to burn your cute master piece!


Step3
Cut out the petals along the interface edge.

Step 4
Prepare your sewing machine and start stiching ( a few rounds )..stopping and turning the petals a few times at the curves.

Step5
Assemble your petals ...yayy almost done ! Join them with a "beacon" or fabric glue if intended for 
 paper craft.

Step 6
Cut out a circle from another contrasting fabric and glue at the centre. You can also add buttons or caboochons.

Step 7
Make some more petals ..yes the more..the merrier!

Hope you find the tutorial useful ...now go scout for momma's sewing machine and start sewing :))


Monday, February 20, 2012

Papier ATCs Group

I'm excited to announce that we're forming our very own Atc group at Papier. Everyone's welcome to join and trade ATCs with the Dt's and fellow crafter's. For those who are new to this term here's the meaning from wikipedia.

Artist trading cards (or ATCs) are miniature works of art about the same size as modern baseball cards,[1] or 2 ½ X 3 ½ inches (63 mm X 89 mm),[2]small enough to fit inside standard card-collector pockets, sleeves or sheets.[3] The ATC movement developed out of the mail art movement and has its origins in Switzerland.[4] Cards are produced in various media, including dry media (pencils, pens, markers, etc.), wet media (watercolor, acrylic paints, etc.), paper media (in the form of collage, papercuts, found objects, etc.) or even metals or cloth. The cards are usually traded or exchanged. When sold, they are usually referred to as art card editions and originals (ACEOs).


For a start each Dt will have their own box of ATCs park at the store. If you wish to trade cards with us simply drop by the store and request for our boxes from the staff. Kindly note there are few simple rules to observe.

1. Exchange of ATCs are base on first come first serve basis.
2. No Atc no exchange.(example-if you wish to exchange 4 ATCs, please ensure you have 4 to give away)
3. No reservation of preferred piece.
4. Please leave your details behind each piece of ATCs. Name and ATCs number/detail if any, email's optional.

Well that's about it. However in future we will announce a swap get together perhaps once in a month where everyone is welcome to drop by the store and meet the Dt for a swap session or simply exchange with other members!. Dt's will replenish their boxes as often as they could and as soon as they have a new collection they'll be sharing it here with you. 


I can't wait to see what everyone will come up with. I am sure i'm gonna be blown away by all the talent out there! So come on ladies and gentleman let's get this swapping started! Ooohhh..happiness!!! :))))

xoxo,

Amelia

Thursday, February 16, 2012

Torn Flower - Tutorial


Happy Thursday Everyone!

Wow time flies..its already Thursday and my turn to share my weekly project. This week it will be different from my earlier sharing. I will be a sharing a tutorial on how to make a Torn Flower. All you need for this project are your leftover patterned papers from any of your earlier projects, ink, brad and button, and I guarantee you that it will only take you less than 10 minutes to make 1 flower with the following 7 easy steps. Simple right?!!

Here are the steps to make the Torn Flower - enjoy!


Step 1: Tear papers into squares, revealing the inner white core.


Step 2: Fold the squares in half, then corner to corner to create creases. Open out and screw uo into a small ball.


Step 3: Open out and tear the edges randonly, roll over tiny flap to create a "worn" look.


Step 4: Ink over the square to reveal the creases, then ink the edges.


Step 5: Your squares are now complete. Stack them into groups of 4 or 5 - depending on the size of flower you want to make.


Step 6: Secure your flower using brad or button, eyelet, etc.


Step 7: You can also apply some ice stickles on the flower.


The flower can be used as embellishment for cards, layouts, to decorate boxes......and many more.


Well thats all for this week. Till we meet again next week.Happy Crafting!!

-Inaz-

Materials List
Patterned Paper
Ice Stickles
Ink
Brads
Buttons

Wednesday, February 15, 2012

You Are My Sunshine - a 12 x 12" layout

 Happy Wednesday everyone! Today, I want to share just a simple 12 x 12" layout. The papers that I have used here are from my DT kit and I started off by misting the white card stock with Glimmer Mist. I have cut out several thin strips from Lime Twist by My Mind's Eye and weaved the vertical and horizontal strips together. I have also gone a bit further by twirling few of its ends.
 I have used few clouds die-cuts from the Maya Road shadow box kit ( also sold at Papier recently ) and applied white texture mixed with blue paints, which are both from the Martha Stewart (MS) paints collection. For the sun, I have applied MS paint as well on a perfect circle and later created the rays by using the liquid pearls by Ranger.
Well, what can I say, I'm sure all of you can whipped this one out in a flash! Easy, eh? :)
Materials used:
White card stock: from my DT kit
Pp: Lime Twist by My Mind's Eye
Mist: Glimmer Mist by Tattered Angels
Paints and white texture paint: Martha Stewart
Ephemera Tickets and die-cuts shapes: Maya Road shadow box kit
See you again next week, same time and same place!
Happy Crafting!

Tuesday, February 14, 2012

Layout - Write Your Own Story

Hi scrappers..this week I wish to share with you a layout that I made using canvas. This time I thought of creating my own background. I love the raw grains of the canvas and chose not to hide them behind a primer. So bye-bye to gesso..I diluted Martha Stewart paints namely " Jonquil " and "Sea Lavender" and painted on the canvas. 


Can you see the canvas's grains above ? Next, I stamped randomly using my fav Studio Calicos stamp.


I love the simplicity of this LO. This is as simple as I could scrap, lol !


Yes..I still need my blooms :))


Have a blessed week ahead friends. Scrap it ! XOX

Monday, February 13, 2012

A Layout Tutorial


I have a simple layout tutorial to share today. In a few easy steps you'll be creating a page for yourself. First gather your supply. 


I'm using Kraft Cardstock as the base, Packaging from Prima and Tim Holtz to create layers, few strips of Pattern Papers, Doilies, Stamps from Hero Arts, Hero Hues, Stanz On Permanent Ink, 3 colors of mists, Buttons, Paper Clip, TH Tissue Tape, TH Metal Embellishment and MME Chipboard Stickers.  


I start with the bottom right of the Kraft Cardstock by layering 2 different Pattern Papers and Tissue tape. 


Next i misted the area lightly and stamp random image using Hero hues


For the top left corner of the cardstock, first layer is TH Packaging followed by Doilies, Pattern Papers, Prima Packaging and few more strips of Papers on the top. 


Randomly add Tissue Tape, mists and stamp image of gears and bubble stamp. 


Lastly adhere photo and embellishment as picture above. 

Have fun trying and enjoy your week everyone..:)

xoxo