
My Waterfall Card for Papier
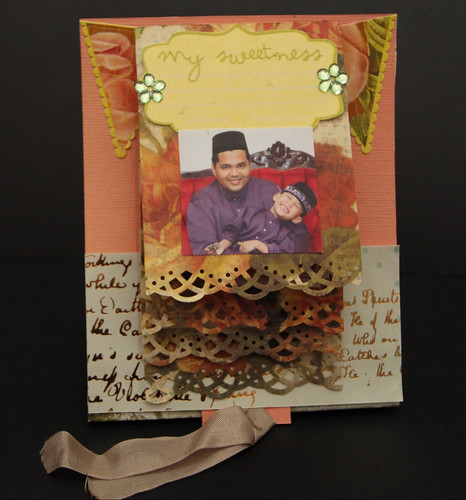
Materials used for this waterfall card:
Base card: Bazzil Basics
Pp for waterfall card: Glitz Design (DT kit), DCWV and Pink Paislee
Adage tickets: Tim Holtz Ideology
Punch: Martha Stewart
Stickers: from my DT kit - last pieces of it
Rhinestones: Hero Arts
(maybe I'll work on more embellies...ha ha)
Most of the items above are available at Papier. Come to the shop today and include some of our craft items as part of your Chinese New Year shopping spree!
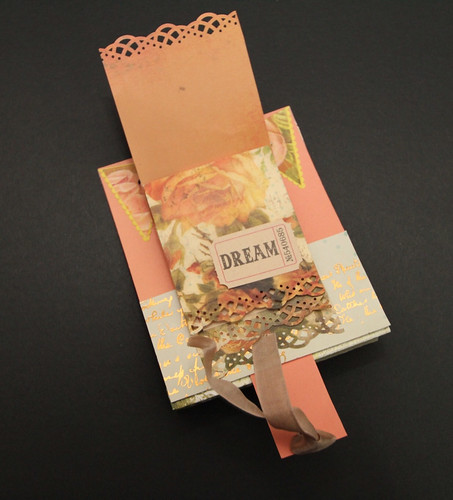
-above shows the 2nd page of my waterfall card. Later to add more photos or light embellies-

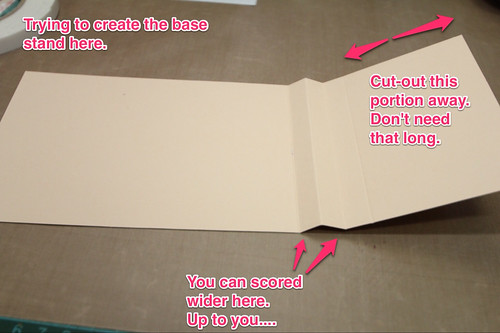
1. First thing, you will need a sturdy card as the base for the waterfall card. Here, I have used Bazzil Basics, of which I have cut about 4.5 x 6" in size.
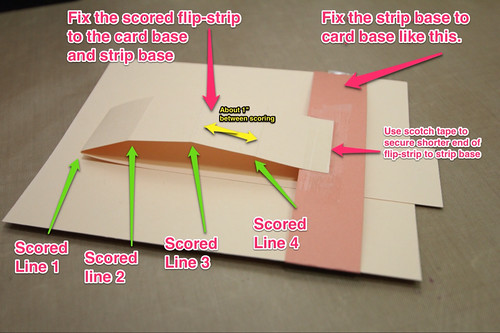
2. Now we need to prepare the 'flip-strip'. I called this the flip-strip because this is the mechanism to flip the waterfall card later. The size of the flip strip I have used here is about 10x1" (length x width).
On the flip strip, we need to do some scoring on equally interval places on it to create as placement for the waterfall card later. Firstly, fold the flip strip in two so that you will have a 6" length on one side and a 4" length on another.On the shorter side of the flip-strip, we will work on the scoring now.
We need to score on 4 places on the shorter strip with each being 1" from one another. The topmost (scored line 1) of the score will be the one that you have scored earlier to create the 6" and 4" length on the strip. Now, just add three more downwards at 1" interval as explained before.
Now that you worked on mostly what is required for the flip-strip, let's put it aside for a while.
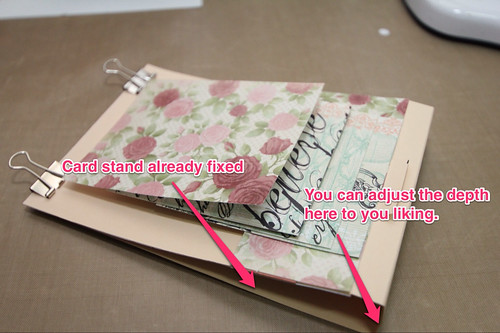
3. Now, we want to work on what I called the 'strip-base'. Basically, it is just a strip of paper (preferably as sturdy as the base card), which you need to paste lower mid-length of the base card that we worked on earlier to create a foundation for the flip-strip to work.
Get anything from your scrap and cut out about 1x4.5". Just glue on the ends of this strip-base to your base card. Just on both of the ends and not the whole thing. The middle portion of it has to be free since this will create a path for the flip-strip to slide in and out.
4. Now take your flip-strip and lay it on the base card with the shorter one facing up. You will need now to secure the end of the shorter length to the strip-base. Secure it with glue or just a scotch tape. It should not move when you are pulling the flip-strip in and out later.
Now, you can put on a nice cover for the base card to hide the strip-base and all the Scotch tape. You can use similar paper like the one for the card base or choose another to your liking. Cut out about 2.5x4.5" out of the paper. The width of this cover should be the same as the card base and the height should be reasonably good in order for the waterfall card to be pulled inwards later. I have use height of about 2.5" in this example. Again, just secure it on the ends only, to the base card.

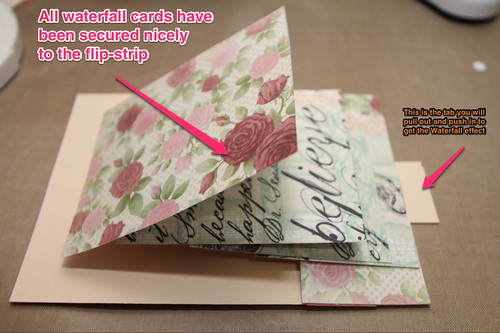
- 1st page: 3x4"
- 2nd page: 3x4.5"
- 3rd page: 3x5"
- 4th page: 3x5.5"


(p/s: please excuse the clutter on my working desk hehe. The more I try to keep it clean, the messier it becomes. Funny, eh? Can anybody testify to this? Lol! )

If you happen to visit my blog, you can also see another waterfall 'mini album' that I did previously. It was total fun to create this one! and very challenging too! Most important thing is; is to have fun when you're creating. Just let your imaginations running wild!
Until then! See ya next week and to all celebrating the Chinese New Year; Gong Xi Fa Cai.
Welcome the dragon! ( can't help recalling one of my fav cartoons, Dungeons and Dragons!).
-Nida-
3 comments:
Lovely card and awesome tutorial Nida :))
nice..!
Wowwww..great tutorial Nida! So detail! Thanks for sharing it here...:)))
Post a Comment