Thursday, March 8, 2012

Just Thoughts - A Flag Book


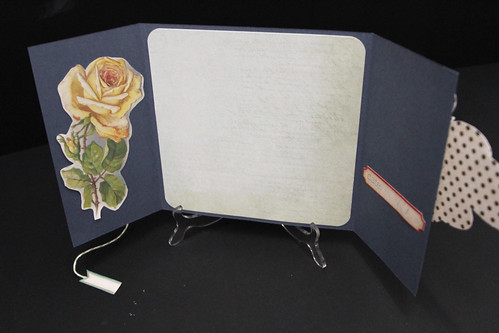
Hi Everyone! Its Thursday and its my turn to post my project. So, this week I will be sharing with you a flag book. 


There are 9 flags stamped with Stamper Anonymous Tim Holtz Collection - Just Thoughts. 


Webster's Pages - Bloomers on the front page. 


That's all for this week..Happy Crafting!

-Inaz-

Materials List
Webster's Pages Western Romance: Love Letters
Tim Holtz Kraft Core Nostalgic Collection
Stamper Anonymous Tim Holtz Collection -  Just Thoughts
Webster's Pages Bloomers - Pink & Blue
White Pearl
Momoyo Buttons
My Sentiments Exactly  Stamp - Love Butterfly
Maya Mist - Antique Bronze Metallic
Tim Holtz Distress Ink - Vintage Photo & Festive Berries
Prima Flowers

Wednesday, March 7, 2012

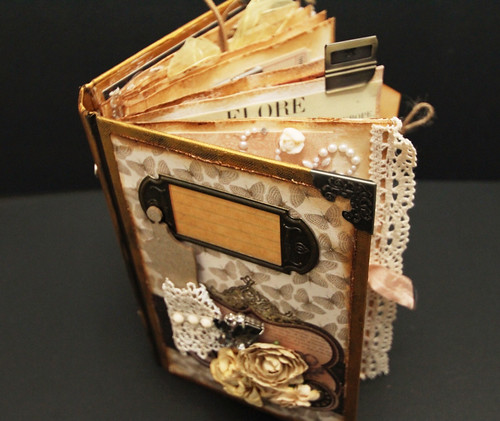
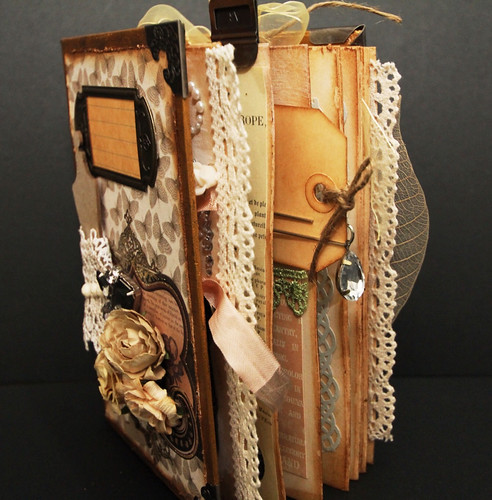
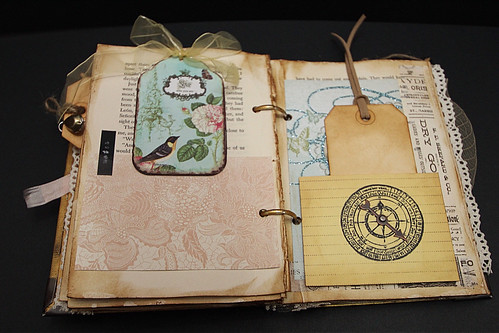
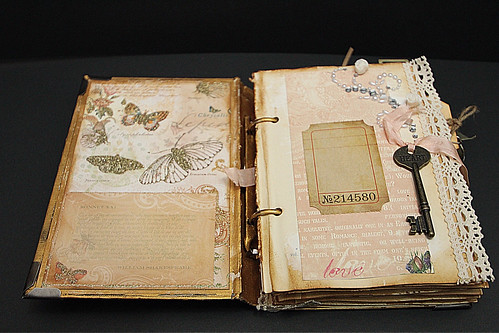
Vintage Altered Book - with simple tutorial!


Hi and Happy Wednesday! Are you a book lover? Well, if you are like me, this project should certainly be one in your list. If you like to write or journal about anything at all and looking for something different to write onto (instead of all those notebooks from the shops); why not make one yourself!

Further below is a short tutorial that I'm sharing with you. If you like the 'vintage'-look and don't mind getting your hands dirty, then head on to your crafting room and start on with this altered book project.

The tutorial:

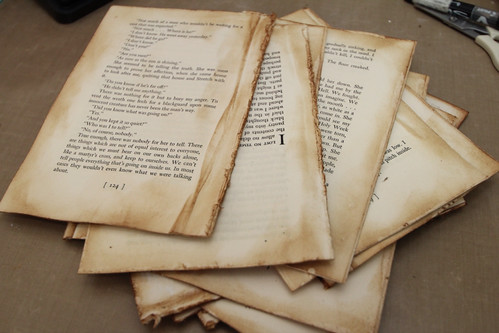
Well, what I have used here is basically an old hard cover book, which I purchased from a local flea market. I bought this for RM5. Not bad. You will need to rip-off all those pages out from its cover.

Glue together at least 5 or 6 pages. This really depends on your needs.

This was how raw it looked before I started to work on it (below). The edges have been partly distressed with Ranger ink. I have used Vintage Photo here.

Next, create. You can start with distressing the edges of each glued pages.
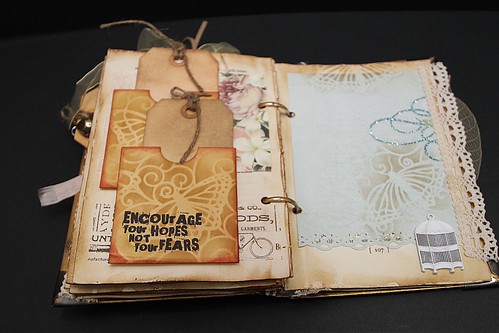
You can use scraps from your stash to create a journalling tag or use naked pockets with tags, and paste it onto these pages, like the one below.

Don't forget to punch onto these pages and use Tim Holtz ring binder to secure these pages together. This ring binder is then secured to the spine of the book with brads; refer below. You can get this ring binder at Papier ;)))

You can see above how I have applied Inka Gold by Viva Decor to the edges of the book cover. I have also applied the same to the ring binder so that it matches perfectly to the whole scheme.

Well, I guess the rest is embellish the altered book as you wish. You can use laces to define the edge of each pages or even ribbons to tie around the ring binder.
If you want to view more of the pages, do stop by at Papier.
Below are the items that I've used in this altered book of mine for this week.


Materials used:
Pp: Webster's Pages (Western Romance) and My Mind's Eye - from DT kit. Also used is DCWV.
Punches: Martha Stewart
Journalling tickets: Tim Holtz Ideology
Pen Nibs: Tim Holtz Ideology
Metal key: Tim Holtz Ideology
Game spinner: Tim Holtz Ideology
Tissue tape: Tim Holtz Ideology
Metal corners: Tim Holtz Ideology
Metal frame(front cover): American Crafts
Metal birdcage: Prima
Lace: DT kit ( edge of pages )
Lace on dress form chippie: Webster's Pages ( I think! Hehe )
Dress form chippie: Dusty Attic
Vintage trinkets: Prima
Gems (on cover): Parisian Anthology House of Three by Pink Paislee
Crystals: Prima
Swirling rhinestones w resin flower: DT kit
Stamp: Tim Holtz and Hero Arts
Stencil: The Crafter Workshop ( TCW )
Distress ink: Ranger
Seam binding ribbon: from a scrapper friend
Metal embellishment with bird: local shop, can't remember the name..hmm..
and Inka Gold by Viva Decor for the cover

Most of the manufacturer items listed above are available at Papier. Even if it is no longer on display, you can come in to the store and place an order ;)))

So, I do hope this altered book will be an inspiration for your next crafting project!

Until then, see ya' next week, same time and same place! Ciao!

Nida


Tuesday, March 6, 2012

Mini Album - MY GEMS

Happy Tuesday all...
Here's my take for this week. My children have been keeping some silly photos of themselves somewhere in their secret boxes. I found them and here is their new home..


I made this 4 1/2 x 4 1/2 inch album using chipboards and painted them with my favourite Martha Stewart Pearl Acrylic paints and I totally love the sweetness effect.


I designed my favourite mini shadow box on the cover to hide a precious vintage pendant / gem from Prima Marketing. Can you spot it?


I also found a 'broken' heart pendant that belongs to my eldest daughter and cut off the broken wings attached to it. Used my beacon and simply place it on my fussy cut. Sshh she is unaware...lol


There !


Some funny photos of my kids circa 2002 ...they were all in their PJs ,just wish I could JUMP then and hug them again when they were squidgy and bubbly..lol


 Introducing.. my Youngest Princess who keeps on reminding me that she wants to be an architect in future. I kept telling her...maybe you can be..this..that..or just be what you want to be, as long as its enough to get you an LV lol. She replied..I just wanna be an architect mom. And don't worry I'll build you your dream house..I know..its a modest cottage surrounded by rolling hills, overlooking an oak tree that has this swing that you are crazy about kan? Owh ma..I'll remember to include a craft table and a sewing machine too?? 
She's a gem :))

Take care everyone..mmuuaahh

Monday, March 5, 2012

Believe Layout


Like every Monday, I bet you know the drill! Back with another layout, this time i'm sharing a photo of my dear daughter with you. Having her favorite sweet moment with Baskin Robbins. 


Material used: Cream Cardstock, WebsterPages Pattern Papers, Cotton Gauze, Prima Packaging, Doilies, Prima Flowers, Making Memories Wire Words, Making Memories Dilly Dally Embellishment Box, Mists and Tim Holtz Tissue Tape. Basic technique of layering and clustering used for this piece. Misting on the upper part of the page to add interest and to avoid over cluttering at the bottom corner of the page.


Stay tune in a couple of days for more Dt postings. Have a good week ahead..:)))

xoxo,

Amelia


Thursday, March 1, 2012

I Know I Can Fly - A Scrapbook Layout


Hi Everyone!

It's my turn again to post my project for this week. This week I would like to share a layout of my first nephew - Imran. He once told me that he wanted to be a pilot. I hope he still does :)

It's a simple layout using a plain green paper from Tim Holtz Kraft Core - Nostalgic Collection. I have added a patterned paper from FabScraps as the centre of the layout. 


I applied Martha Stewart Craft -Texture White Effect on my layout this time and stamped on the texture effect to create background.


Embellishments - buttons, arrow (Je't Adore) and patterned paper from Kaiser Craft On the Move Collection. 


Thats all for this week...see you next week and Happy Crafting!!!

-Inaz-

Materials List

Tim Holtz Kraft Core Nostalgic Collection
Fab Scraps Heritage Script
Kaiser Craft On the Move Collection - Accelerate
Martha Stewart Craft White Texture Effect
Distress Ink - Vintage Photo
Momoyo Buttons
Studio Domestic Foam Stamp Collection


Tuesday, February 28, 2012

ATCs anyone?

Happy Tuesday...hope all of you are in the best health and best mojo. Here's my latest batch of ATC that I'm happy to exchange with you. They are happily waiting for new owners at Papier. Do ask our friendly staff for my box okay.


Basically some of the techniques used will be taught in our soon to be announced (BIG TIME!) ATC/CROP MARKET on 25th March..so, please save the date and be prepared for some explosion of laughter and fun..always.


Notice the cute metal sentiment? I run my sandwich of embossing mould and metal sheet through my Big Shot-Pro and loveeee the effect. Decided to put all the metal sentiments on my ATCs to inspire you :))


Have a blessed week ahead..and hope to see you soon!

Monday, February 27, 2012

Chubby Alif Layout By AK


I love Monday just because i get to do my studio work at Papier! Have to admit i love my job so much! lol. Today i'm sharing another layout with you. I found an old picture of my son when he was about 1 1/2 yrs old. He was a chubby baby and lost weight at 2 till 7. Now that he's 9 he seriously have an appetite for food! lol. It's interesting to see changes in your child development and the most important is he stays healthy. 


For this page i used white cardstock, Kaisercraft and Prima Pattern Paper, MME Chipboard Stickers, Cotton Gauze, TH Tissue Tape, MM Glitter Alpha, Buttons, Mists, Stamps and a lot of fussy cut and layering. If you notice lately i like to tear out my papers, well there's a reason behind that. My paper trimmer needs a new blade and guess what? I can't find time to change it! Hah..that's how busy or lazy i am these days. Again if my trimmer was okay i wouldn't have created this interesting piece would i? lol. Enough excuses on my part.


For you crafters out there, don't let anything dampen your spirit to scrap. No trimmer, no precision scissors? It's okay just let your imagination run free and yes i am sure you'll find your magic touch somewhere. Till next time. Take care! :)


xoxo

Amelia 

Thursday, February 23, 2012

Stepper Card


Hi Everyone and Happy Thursday!

This week has been a super busy week for me...with work, deadlines,etc.I miss the long weekend and cant wait for the next public holiday..but somehow I'm glad that I managed to squeeze some time out of my busy schedule to complete my weekly project.   


So this week I will be sharing a card - Stepper Card (3 dimensional card). It is easy, fast and fun to work on this stepper card. Once you have a side stepper base you can decorate it however you like.


For this card I have decorate it with some butterflies and balloons using Martha Stewart puncher, pearls and buttons from Momoyo.

Small glass message bottle - highlight for my stepper card.

I have also attached a template of the stepper card for you to make your own. Have fun & enjoy...

Till we meet again next week...Happy Crafting!

-Inaz-

Materials List

Pink Paislee Oyster Bar (Paper)
Kaisercraft Miss Nelly Collection - Her Habits
Webster's Pages Designer Trim - Country Estate
Martha Stewart Puncher - Monarch Butterfly
Martha Stewart Puncher - Balloon
Momoyo Embellishments Buttons
Pearls
Distress Ink

Wednesday, February 22, 2012

Card Ideas - and a very simple one! ;)))

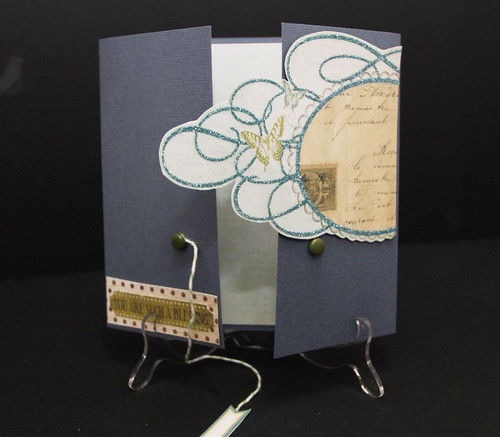
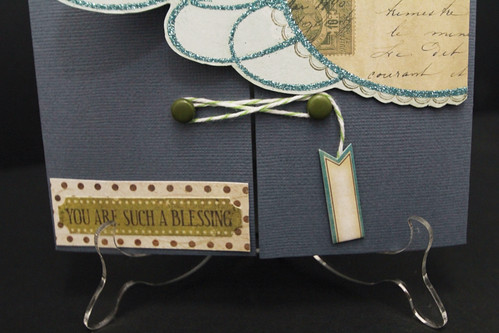
 Hi there and Happy Wednesday everyone! This week I'm doing a simple card with some of the materials from my DT kit. This card comes with a 'latching mechanism' (Lol!), well basically I've used 2 eyelets and brads and a lime twist to secure the card openings together. That's all! Hope you like it! 

And don't forget on our newly established ATCs group here at Papier. We will be leaving our ATCs at Papier and you are most welcome to swap with us! Just remember to leave your particulars behind your ATCs so that we know who you are! ;)))


 Materials used:

Base card: American Crafts

Pp: My Mind's Eye

Brads: Momoyo

Diecut flower: Glitz Design / Kaisercraft

That's all from me this week folks! Till we meet again, same time and same place! Ciao! 

Tuesday, February 21, 2012

Tutorial - Fab Fabric Flower

Howdy folks...ready for a tutorial ? Lets see if I can pull through alright..lol. This flower that I'm showing you how to make is my favourite. Simply because of the endless possibilities of how to use it. It can be a corsage, a sweet flower on your layout or card, a tag, a hairclip and so on..

These are the things / materials you need


Step 1
Draw 7 petals of a size you like, on an interface ( you can buy this at a tailor shop - its for thickening and strenghtening your fabric )

Step 2 
Cut out the petals and place the sticky side on the wrong side of the fabric. Iron on using a mini iron or your normal iron. Caution not to burn your cute master piece!


Step3
Cut out the petals along the interface edge.

Step 4
Prepare your sewing machine and start stiching ( a few rounds )..stopping and turning the petals a few times at the curves.

Step5
Assemble your petals ...yayy almost done ! Join them with a "beacon" or fabric glue if intended for 
 paper craft.

Step 6
Cut out a circle from another contrasting fabric and glue at the centre. You can also add buttons or caboochons.

Step 7
Make some more petals ..yes the more..the merrier!

Hope you find the tutorial useful ...now go scout for momma's sewing machine and start sewing :))